Auspex Fire
Installation
The Auspex Fire pipe and fitting system provides a revolutionary solution to meet new standard requirements in the fire industry.
Making A Joint
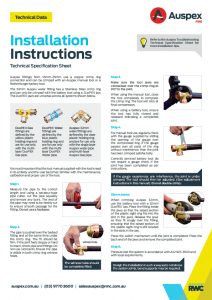
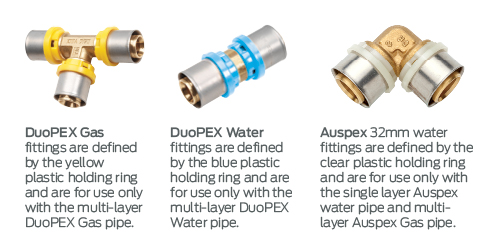
Auspex fittings from 16mm-25mm use a copper crimp ring connection and can be crimped with an Auspex manual tool or a Rothenburger battery tool.
The 32mm Auspex water fitting has a Stainless Steel crimp ring and can only be crimped with the battery tool using a DuoPEX jaw (see Auspex Fire manual page 9). The DuoPEX jaws are universal across all systems shown right.
It is most important that the tool manual supplied with the tool is read in its entirety and the user becomes familiar with the maintenance, calibration and proper use of the tool.
Step 1
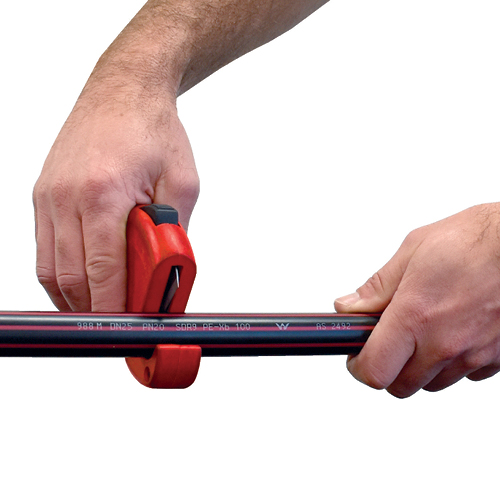
Measure the pipe to the correct length and using a secateur-type pipe cutter, cut the pipe squarely and remove any burrs. The end of the pipe may need to be freshly cut to ensure smooth passage for the fitting. Do not use a hacksaw.
Step 2
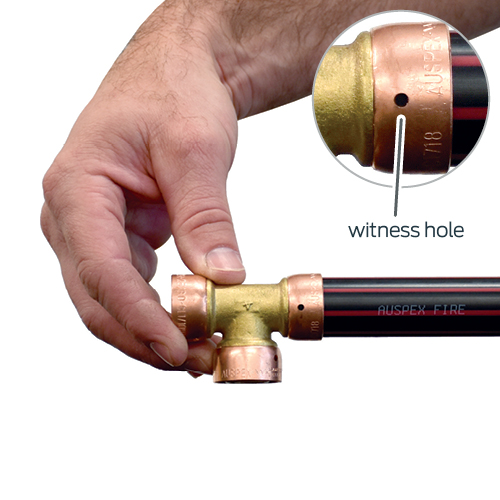
The pipe is pushed over the barbed fitting and at the same time under the crimp ring. The fit should be firm. If the joint feels sloppy or hard to insert, check pipe and fittings. Do not use lubricants. Ensure the pipe is visible in both crimp ring witness holes.
The witness holes should be completely filled.
Step 3
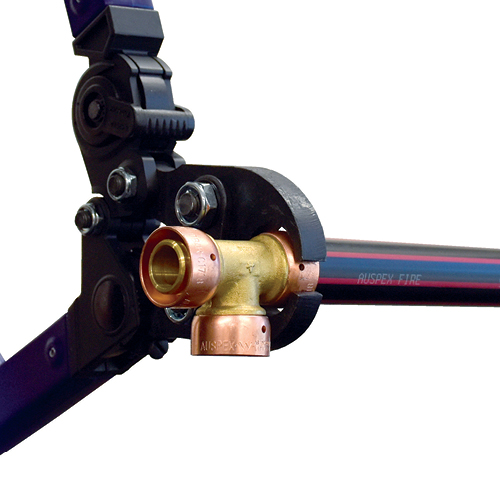
Make sure the tool jaws are centralised over the crimp ring at 90° to the joint.
When using the manual tool, close the tool completely to compress the crimp ring. The tool will click at final compression.
When using a battery tool, ensure the tool has fully closed and released indicating a completed joint.
Step 4
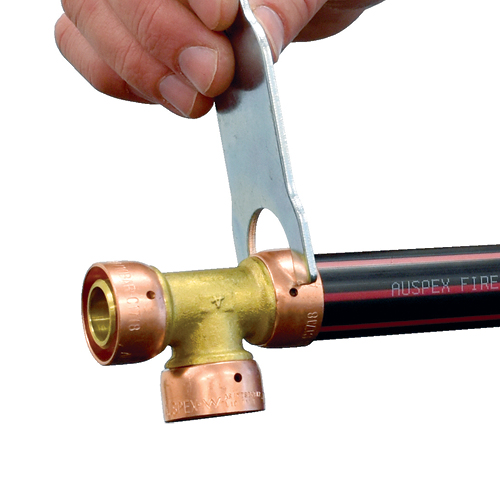
For manual tool use, regularly check with the gauge supplied by sliding the opening of the gauge over the compressed ring. If the gauge passes over all parts of the ring without interference, then the joint has been crimped satisfactorily.
Correctly serviced battery tool do not require a gauge check if the joint has been completed as per instructions.
If the gauge experiences any interference, the joint is under crimped. The tool should then be adjusted. (See adjustment instructions in the Auspex Fire Manual). Do not double crimp.
32mm Joints
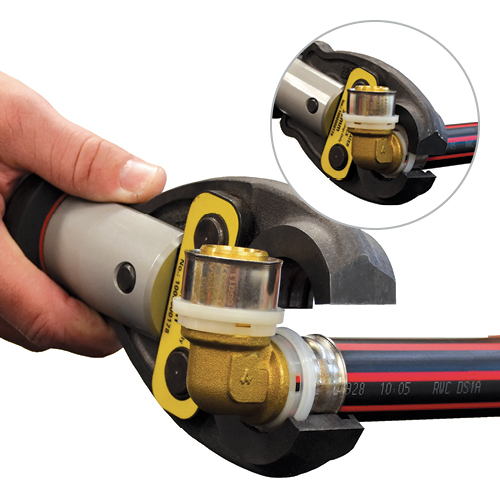
When crimping Auspex 32mm, use the battery tool with a 32mm DuoPEX Jaw. Place the fitting inside the jaws so that the raised section of the plastic sight ring fits into the slot in the jaws. Release the jaws so they fit snugly over the fitting, ensuring that the raised section of the plastic sight ring is still located in the slots in the jaw.
Press the switch mechanism until the joint is completed. Press the back end of the jaws and remove the completed joint.

Step 5
Pressure test the system in accordance with AS/NZS 3500 and with local requirements.
Design the installation in such a way as to not stress the system joints, bend supports may be required.
General Installation Tips
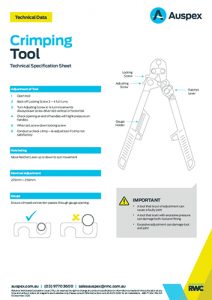
Tool Adjustment
Incorrect adjustment can cause under-crimping and failure of the joint. It is good practise to check tool adjustment regularly.
- Ensure all moving parts are always kept well lubricated
- Open the handles fully
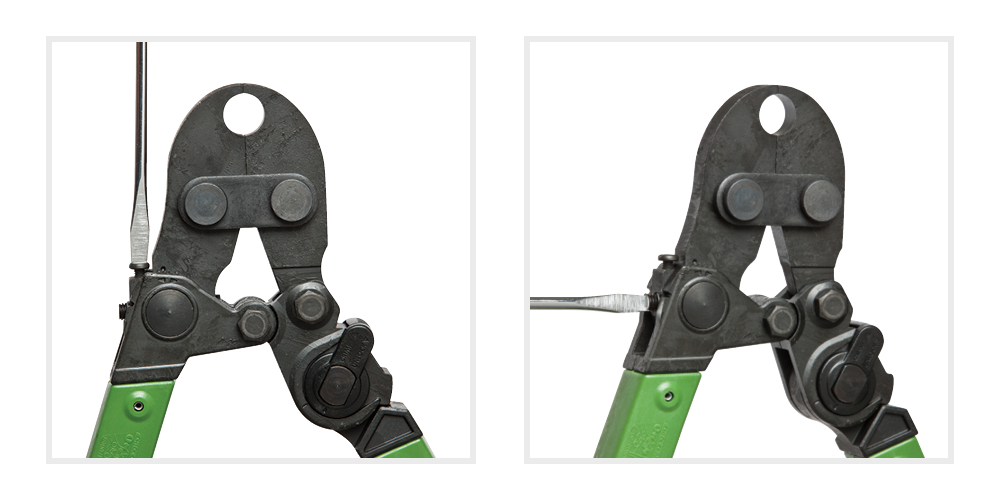
- Using a flat head screwdriver, loosen (but don’t fully unscrew) the locking bolt
- Using a screwdriver, rotate the adjusting screw a quarter turn clockwise
- The adjusting screw has 4 flat faces in a square shape for the locking bolt to fix on. Therefore the adjusting screw must always be vertical or horizontal in orientation and never at an angle or the locking bolt will damage it
- Retighten the locking bolt
- Crimp a new trial joint as a test away from the working location and test with the gauge
- If OK, continue to use the tool
If the gauge fails, repeat adjustment until trial crimped joint is correct. More detailed instructions are included with the tool.
Manual tools available for copper crimp ring connections 16, 20 and 25mm. Only Auspex approved tools can be used.
Pinched Ring
When crimping Auspex fittings, care should be taking to ensure the tooling is positioned correctly so to not pinch the crimp ring. Fittings that are damaged in this manner should be replaced.
Clips
Pipe clips should be installed so that the pipe can move freely. Plastic system clips are available, however if using a non-propriety clipping system, they must be non-metallic where in contact with the pipe. General cable ties are not recommended. Any damage caused by non-propriety clips will not be covered by warranty. Neutral Cure silicon is permitted in AS/NZS 3500 to protect pipes through penetrations.
Recommended support spacings:
| Diameter | Horizontal | Vertical |
|---|---|---|
| 20mm | 700mm | 1400mm |
| 25mm | 750mm | 1500mm |
| 32mm | 850mm | 1700mm |
