Auspex Gas
Installation
The Auspex Gas pipe and fitting system is a revolutionary alternative for the professional plumber and gasfitter that makes any job quicker and easier.
Only available in Australia.
Making A Joint
16mm to 25mm Fittings

It is extremely important that the tool instructions supplied with the tool are read in their entirety, and the user becomes familiar with the maintenance, precautions and the proper use of this tool.
The following describes, in general terms, the jointing procedures but should not be regarded as a substitute for reading and applying the detailed instructions supplied with the tool.
Step 1
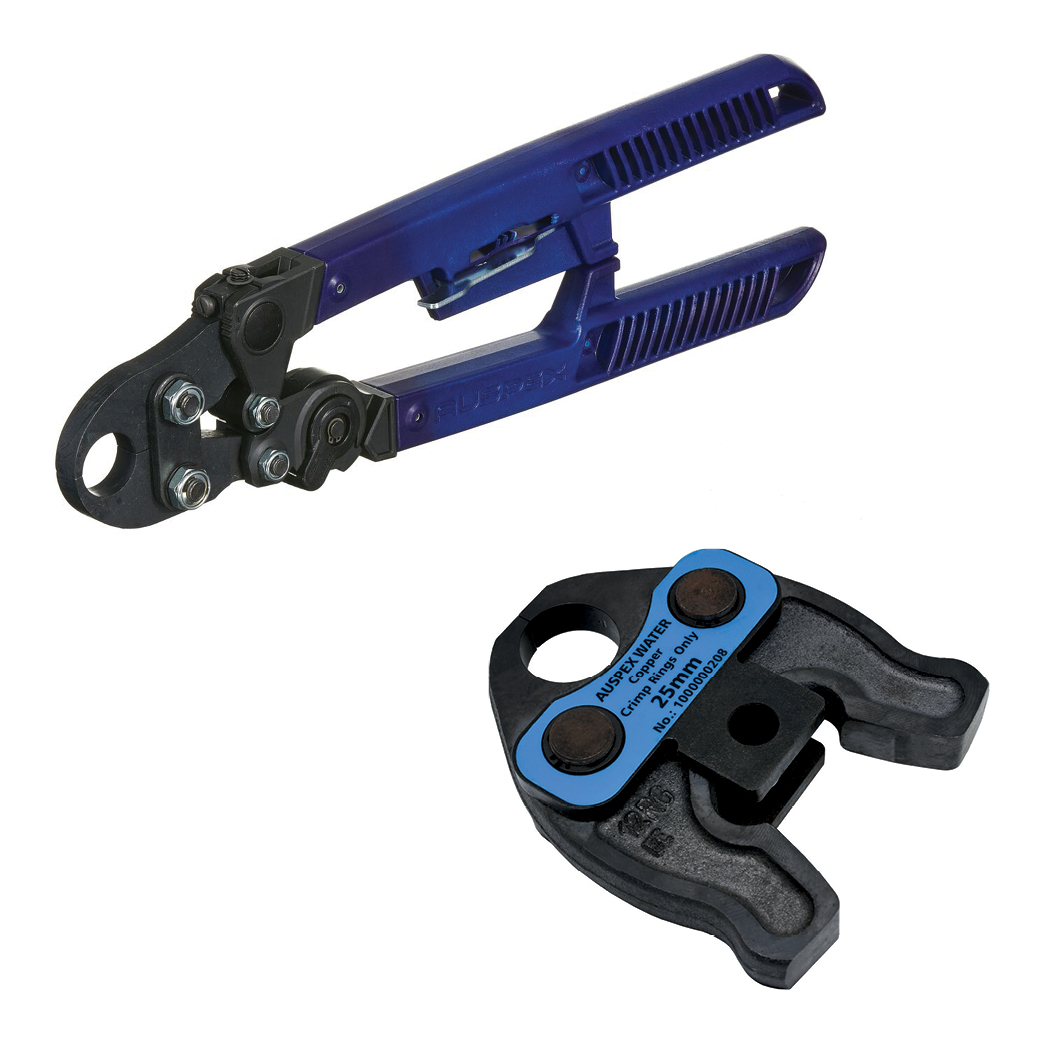
Select the correct tool and jaw size to suit the fitting to be crimped. The jaws must be examined in terms of possible damage or dirt in the compression area.

Step 2
If utilising a battery operated tool, ensure that the battery is fully charged and attach it to the tool.
Step 3
Insert the jaw and line up the holes in the tool with the hole in the jaw. Push the pin through the hole in the jaw and turn pin to lock. Ensure pin is locked into position prior to commencing crimp. To change the jaw push the pin in and turn pin to unlock.
Step 4
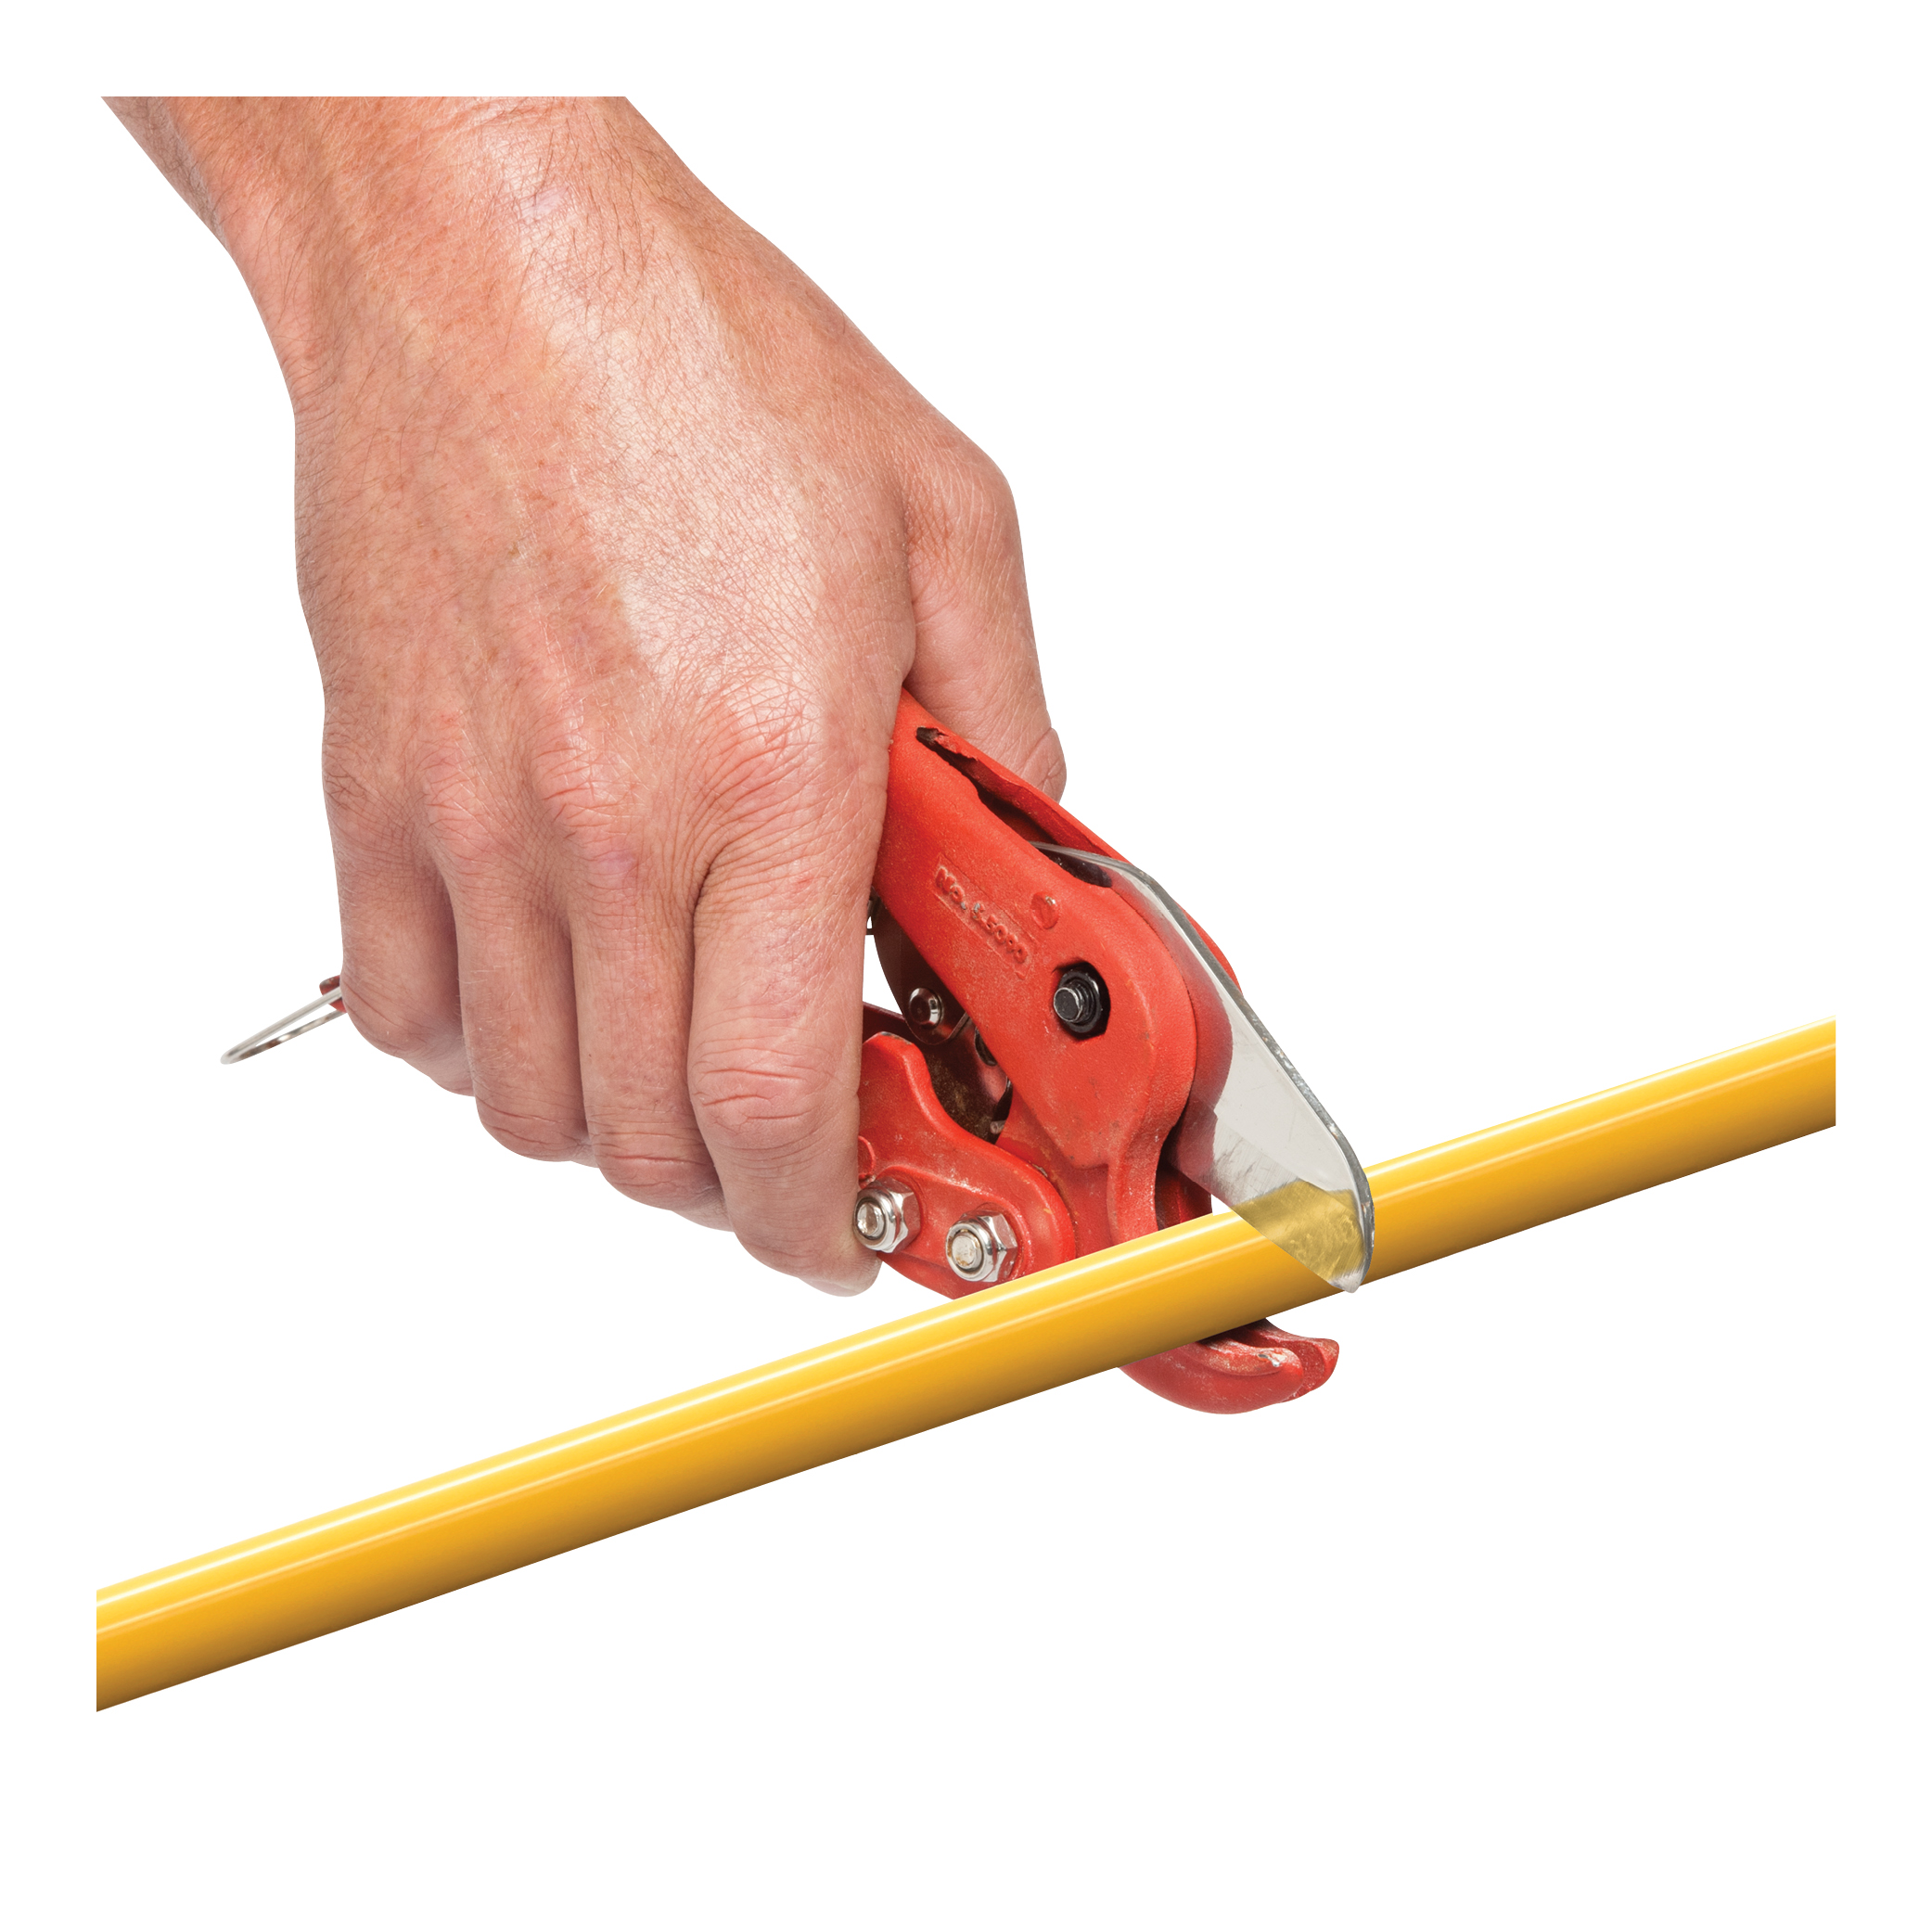
Cut the pipe to the required length with the recommended multi-layer pipe cutters.
Step 5
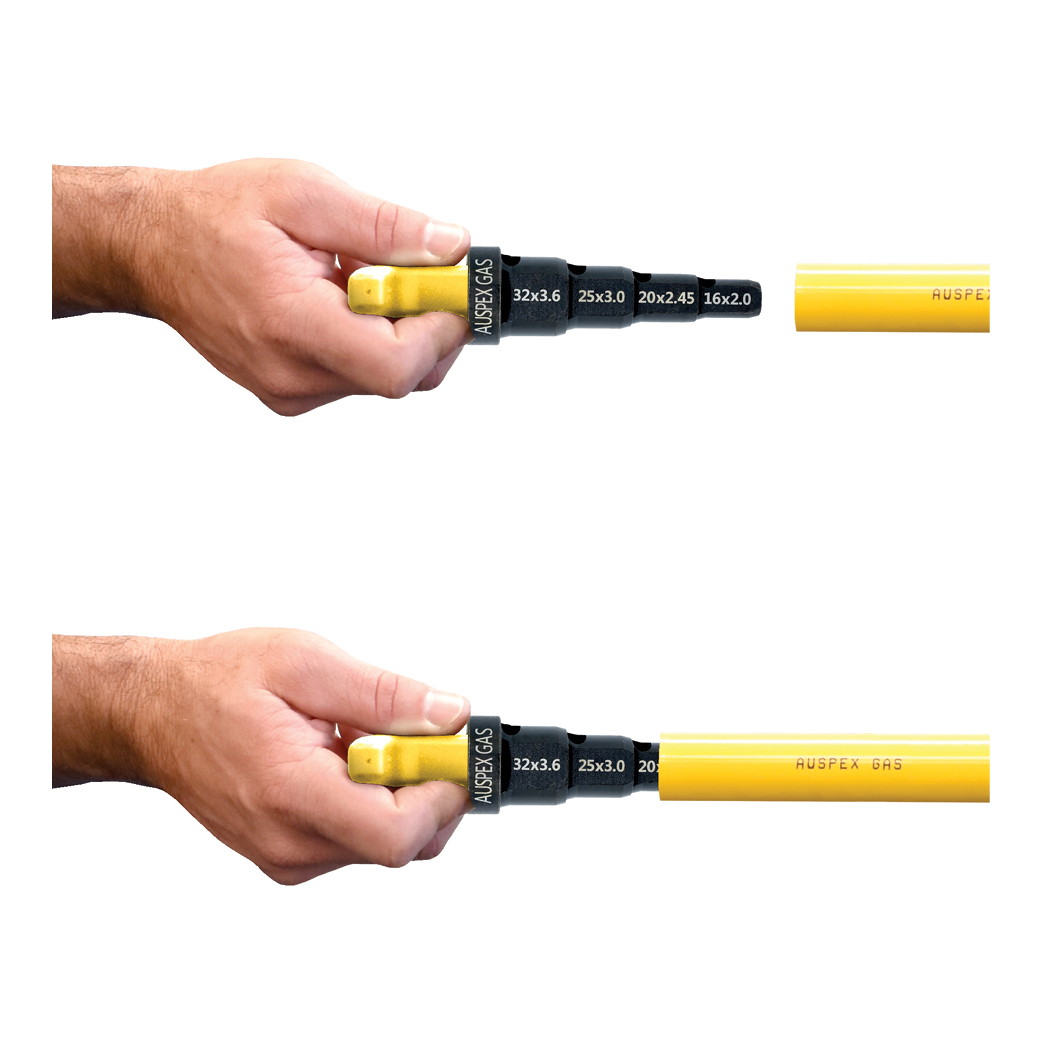
Insert the approved (16-32mm) yellow handle calibrating/deburring tool into the pipe, and then alternately turn in a clockwise and in a counter-clockwise direction. Ensure that a consistent, smooth chamfer is formed on the end of the pipe.
Step 6
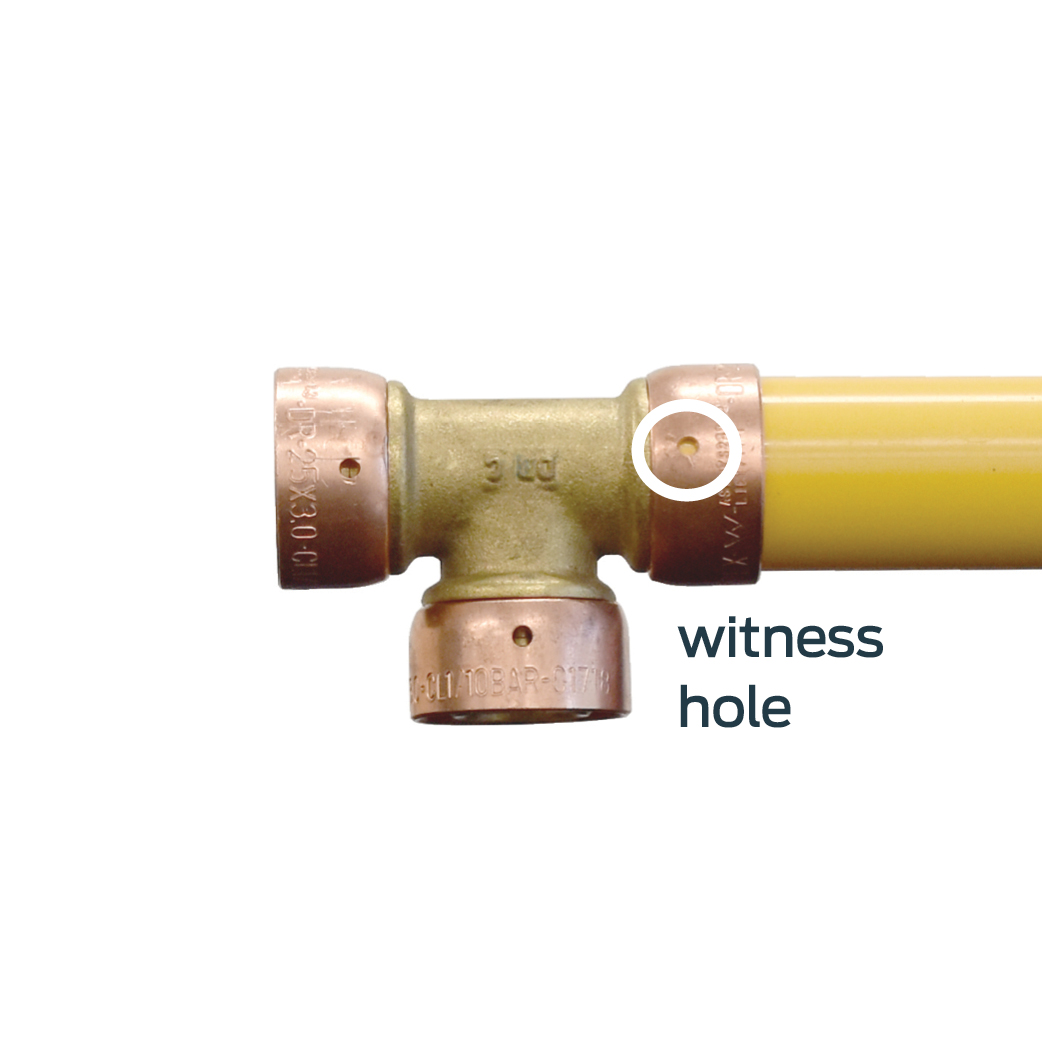
Push the pipe over the barbed fitting and at the same time under the crimp ring. The fit should be firm. If the joint feels sloppy or hard to insert, check pipe and fittings. Do not use lubricants. Ensure the pipe is visible in the crimp ring witness hole.
Step 7
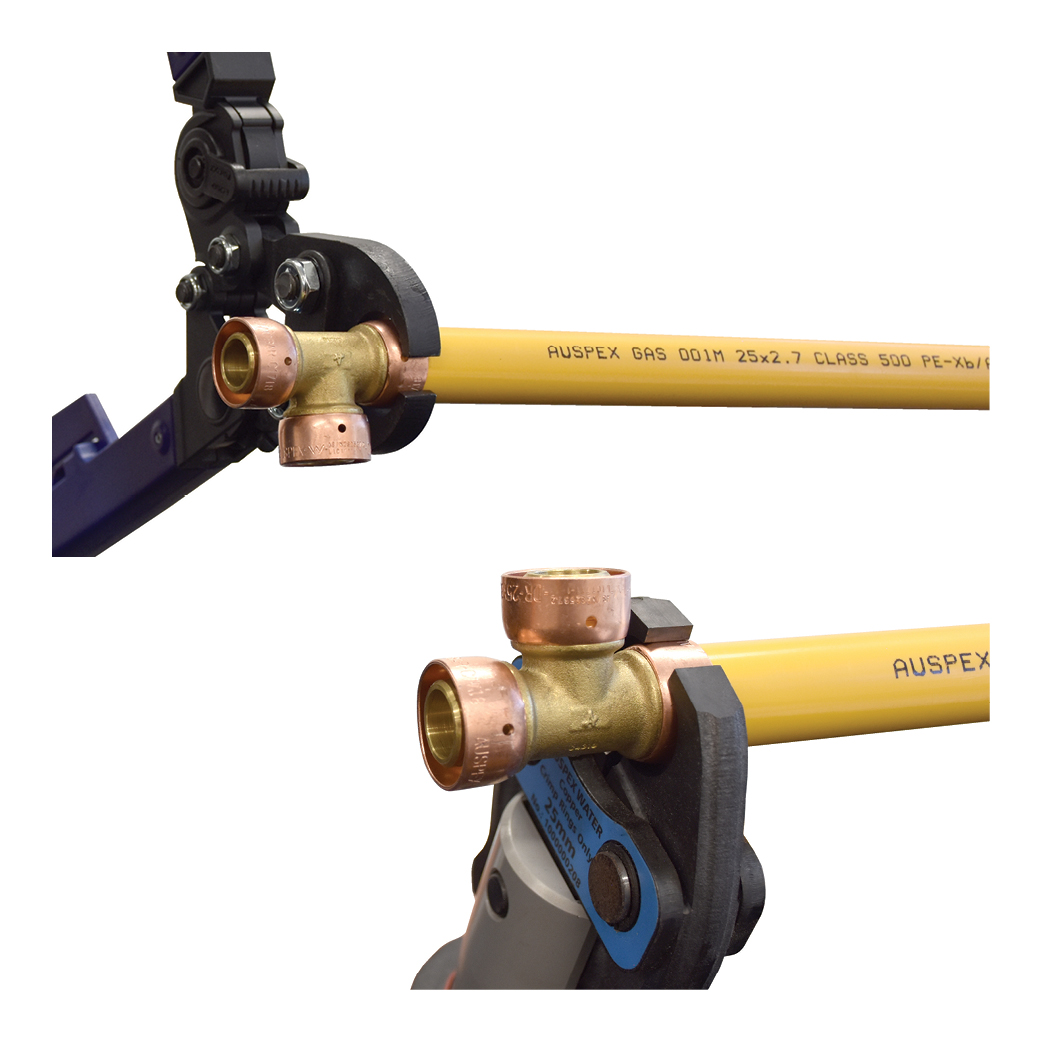
Make sure the tool jaws are centralised over the crimp ring at 90° to the joint.
When using the manual tool, close the tool completely to compress the crimp ring. The tool will click at final compression.
When using the battery tool, press the switch until the crimp is completed.
Step 8
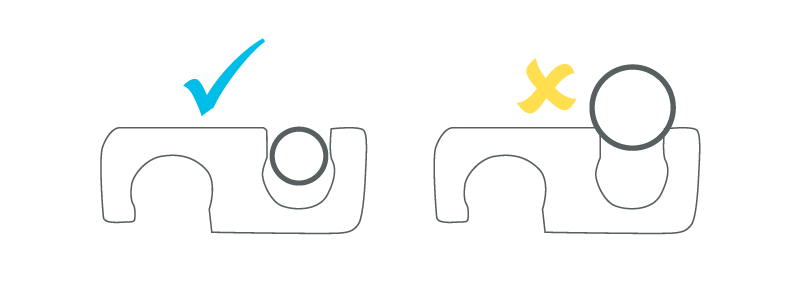
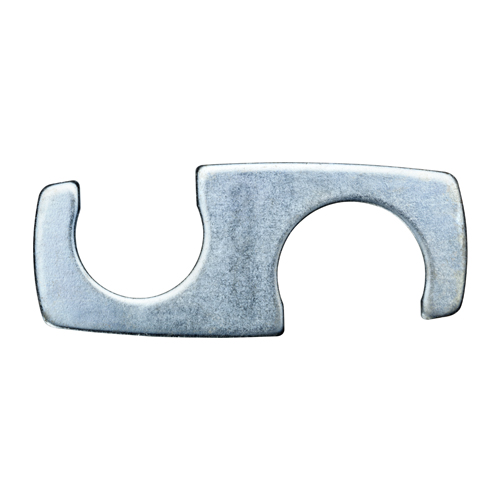
When using Auspex hand crimpers, check with the gauge supplied by sliding the opening of the gauge over the compressed ring. If the gauge passes over all parts of the ring without interference, then the joint has been done satisfactorily.
If the gauge experiences any interference, the joint is under crimped. The tool should then be adjusted.
Making A Joint
32mm Fittings

It is extremely important that the tool instructions supplied with the tool are read in their entirety, and the user becomes familiar with the maintenance, precautions and the proper use of this tool.
The following describes, in general terms, the jointing procedures but should not be regarded as a substitute for reading and applying the detailed instructions supplied with the tool.

Step 1
Ensure that the battery is fully charged and attach it to the tool.
Step 2
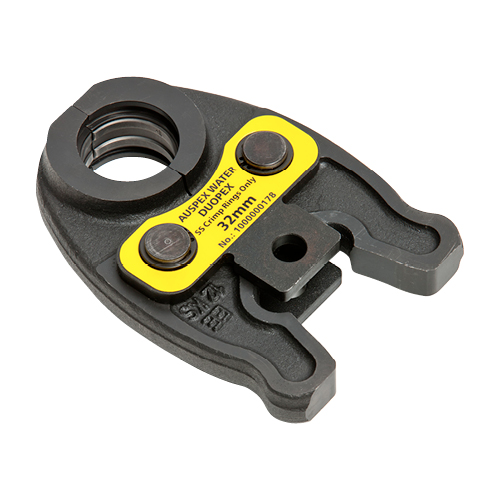
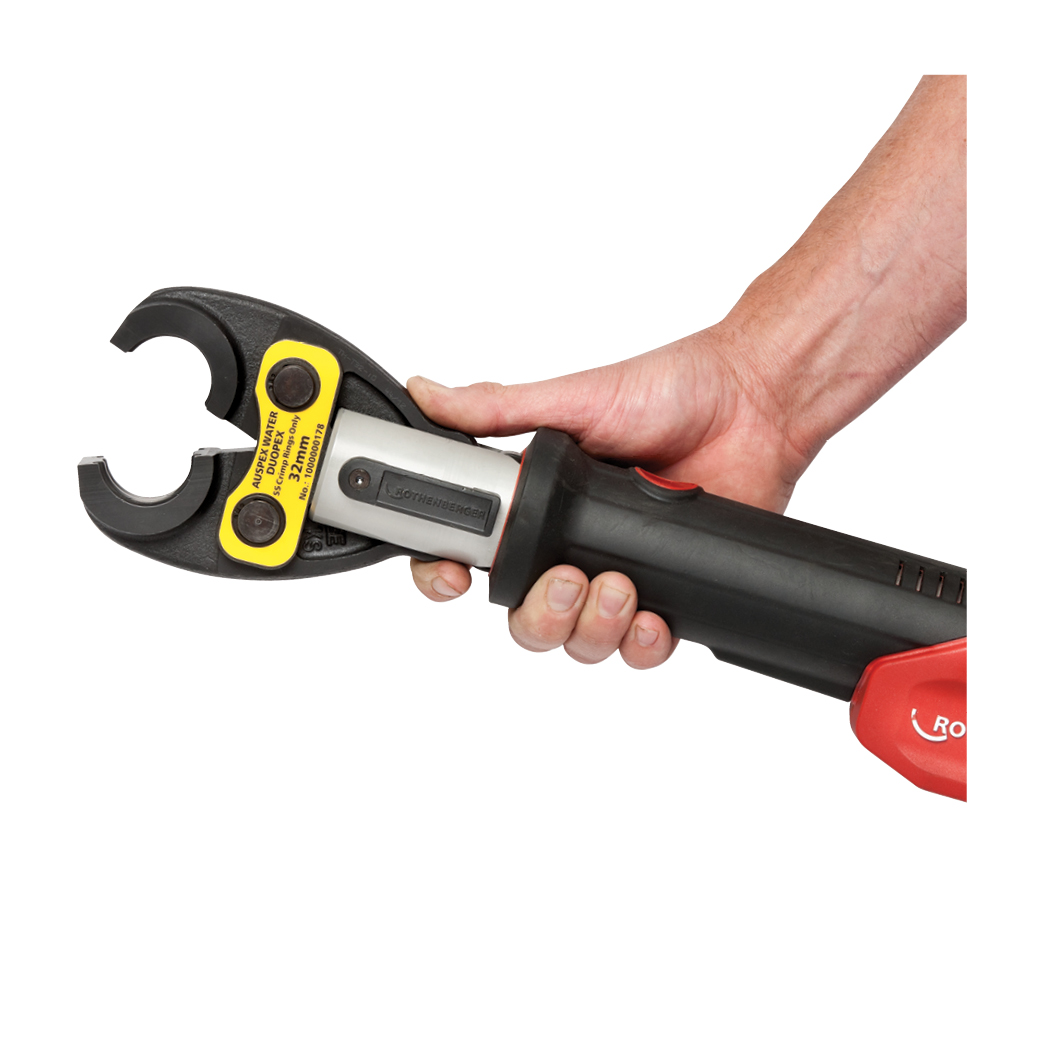
Select the 32mm DuoPEX Gas jaw. The jaws must be examined in terms of possible damage or dirt in the compression area.
Step 3
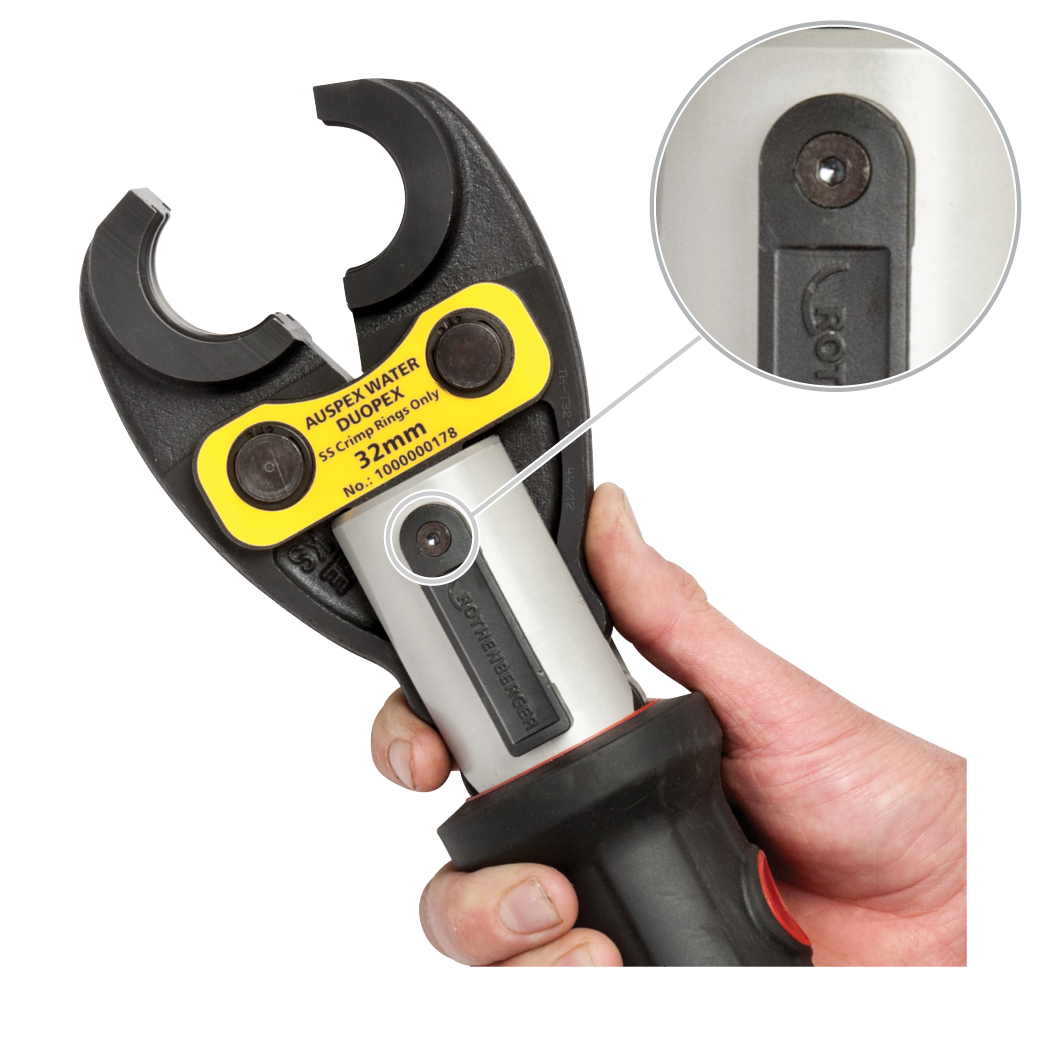
To change the jaw push the pin in and turn pin to unlock.
Step 4
Insert the jaws and line up the holes in the tool with the hole in the jaw.
Step 5
Push the pin through the hole in the jaw and turn pin to lock.

Step 6
Cut the pipe to the required length with the recommended multi-layer pipe cutters.
Step 7
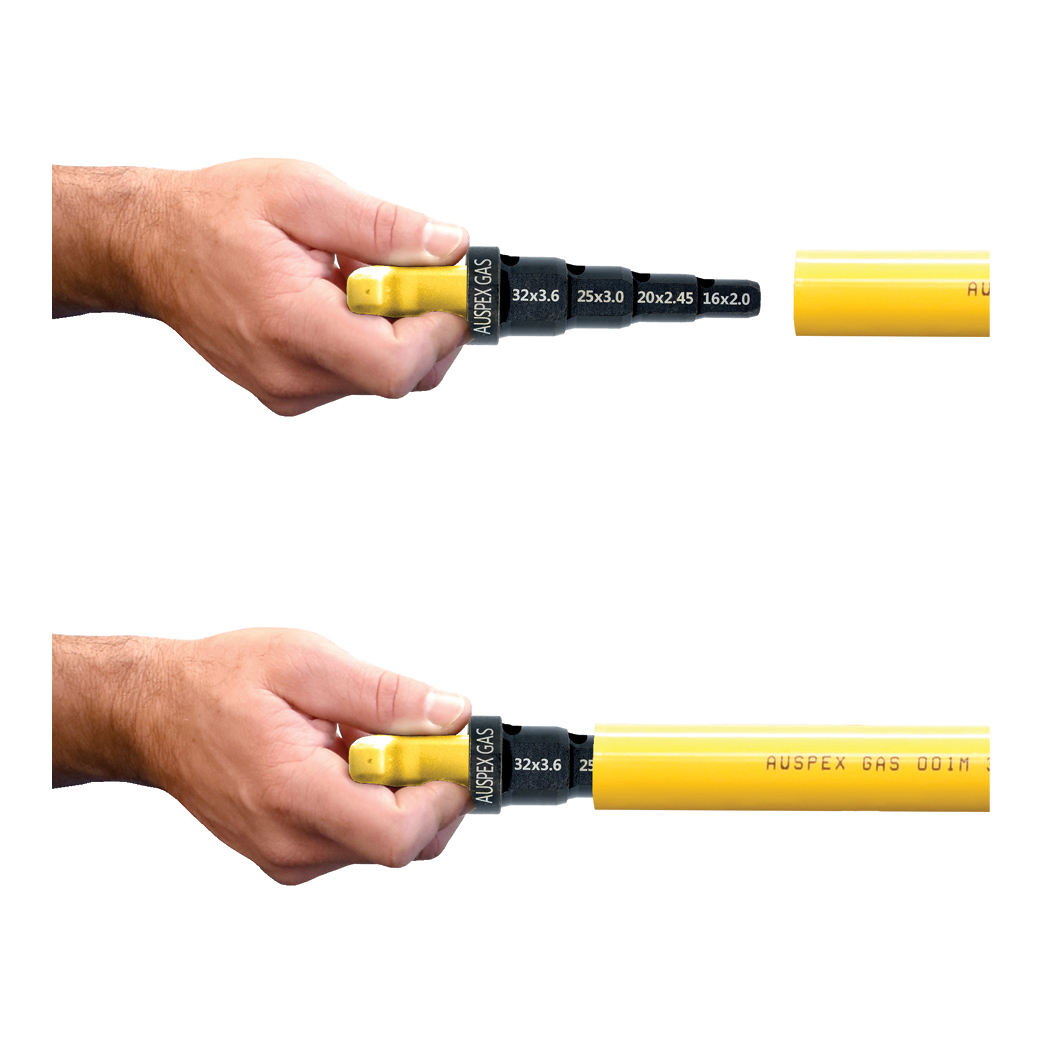
Insert the approved (16-32mm) yellow handle calibrating/deburring tool into the pipe, and then alternately turn in a clockwise and in a counter-clockwise direction. Ensure that a consistent, smooth chamfer is formed on the end of the pipe.
Step 8
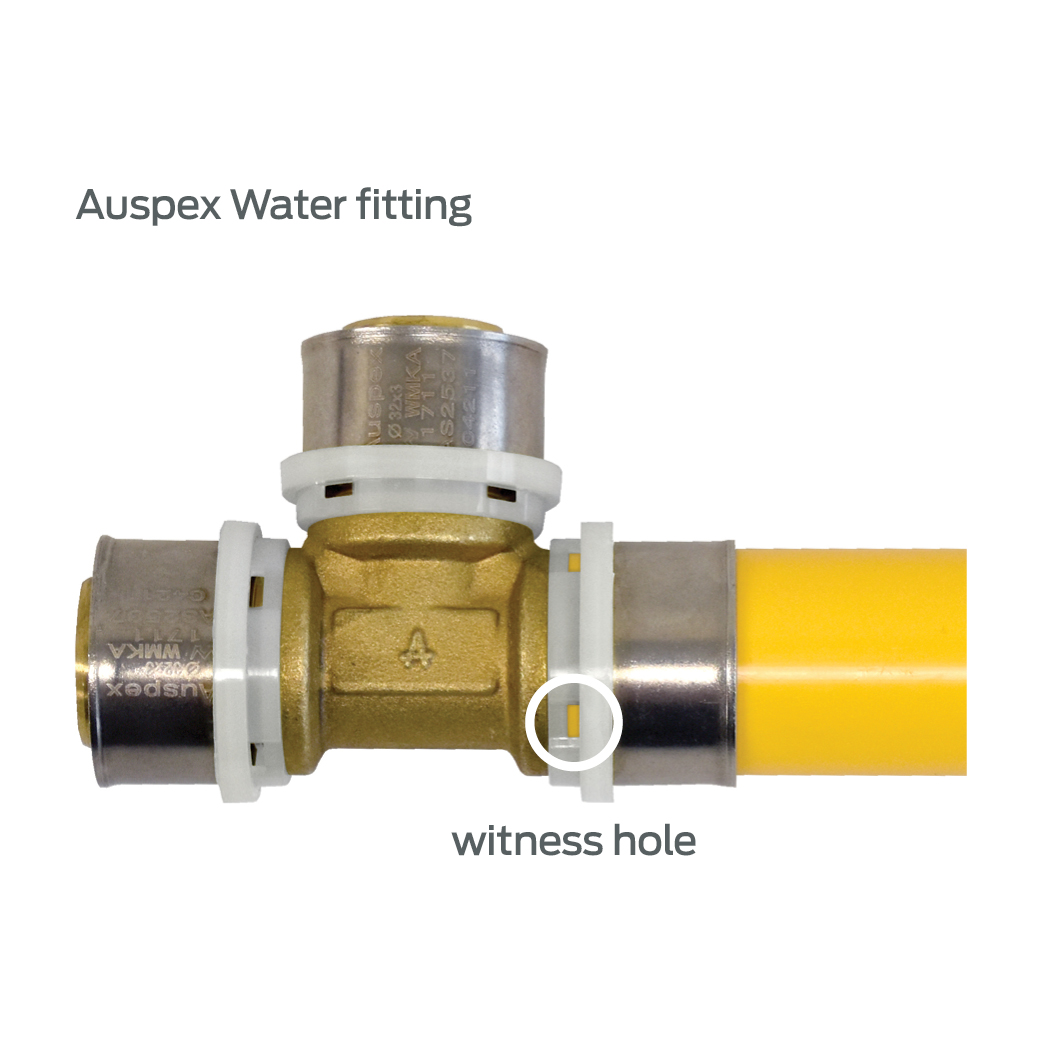
Insert the pipe over the fitting and under the stainless steel ring and push the pipe until it is visible in the slots of the plastic sight ring (witness hole). This ensures you have pushed the pipe home.
Step 9
By squeezing the back of the jaw, the jaws will open. If you look at the machined profile on the inside of the jaws you will note a slot on each side of the profile.
Step 10
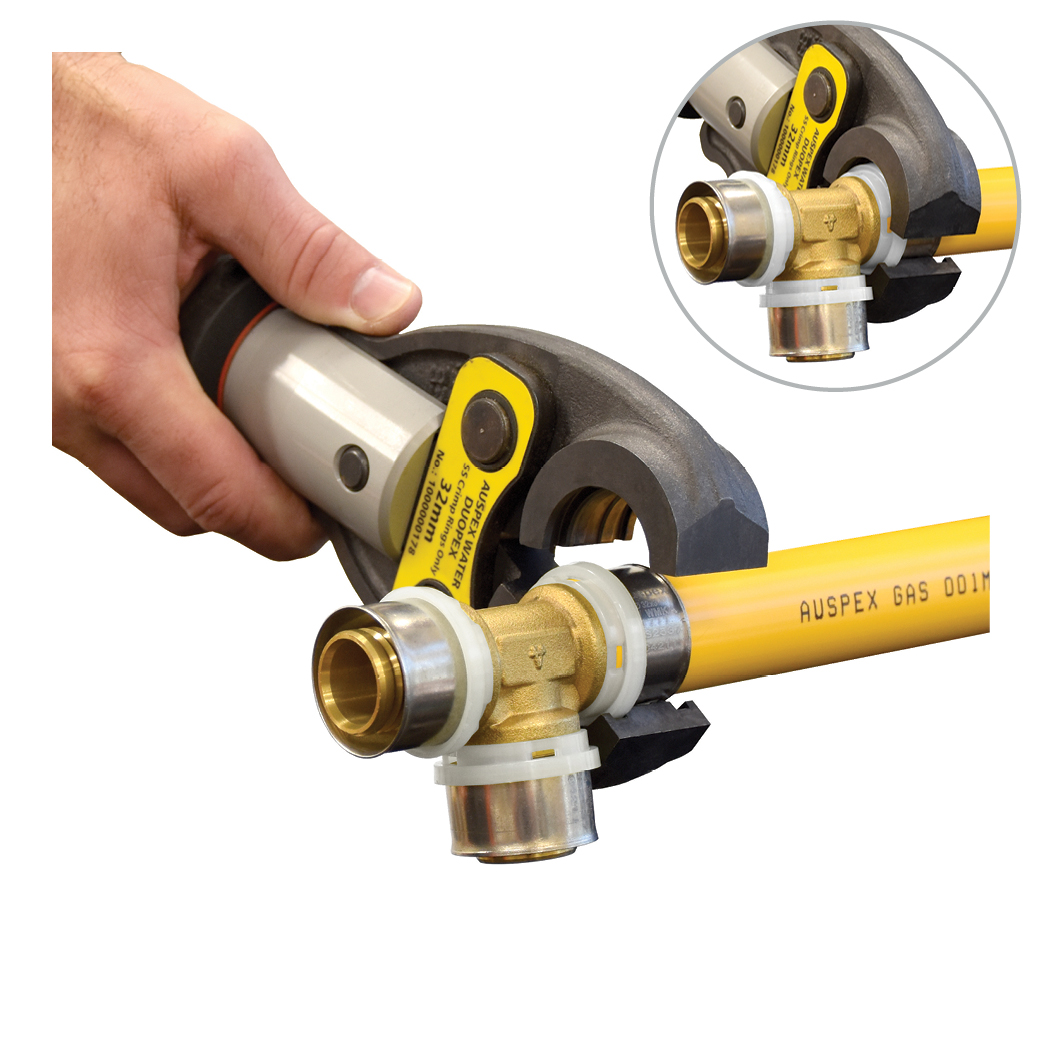
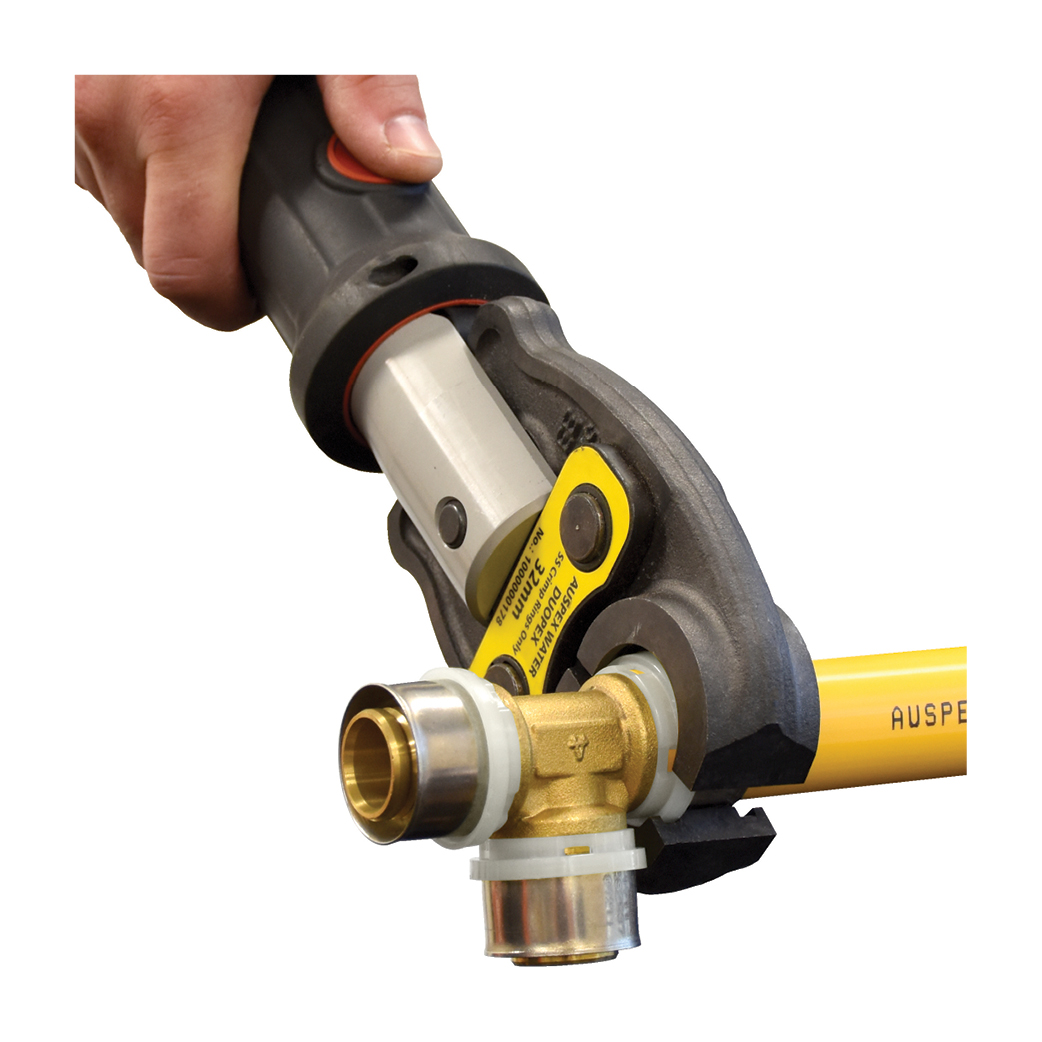
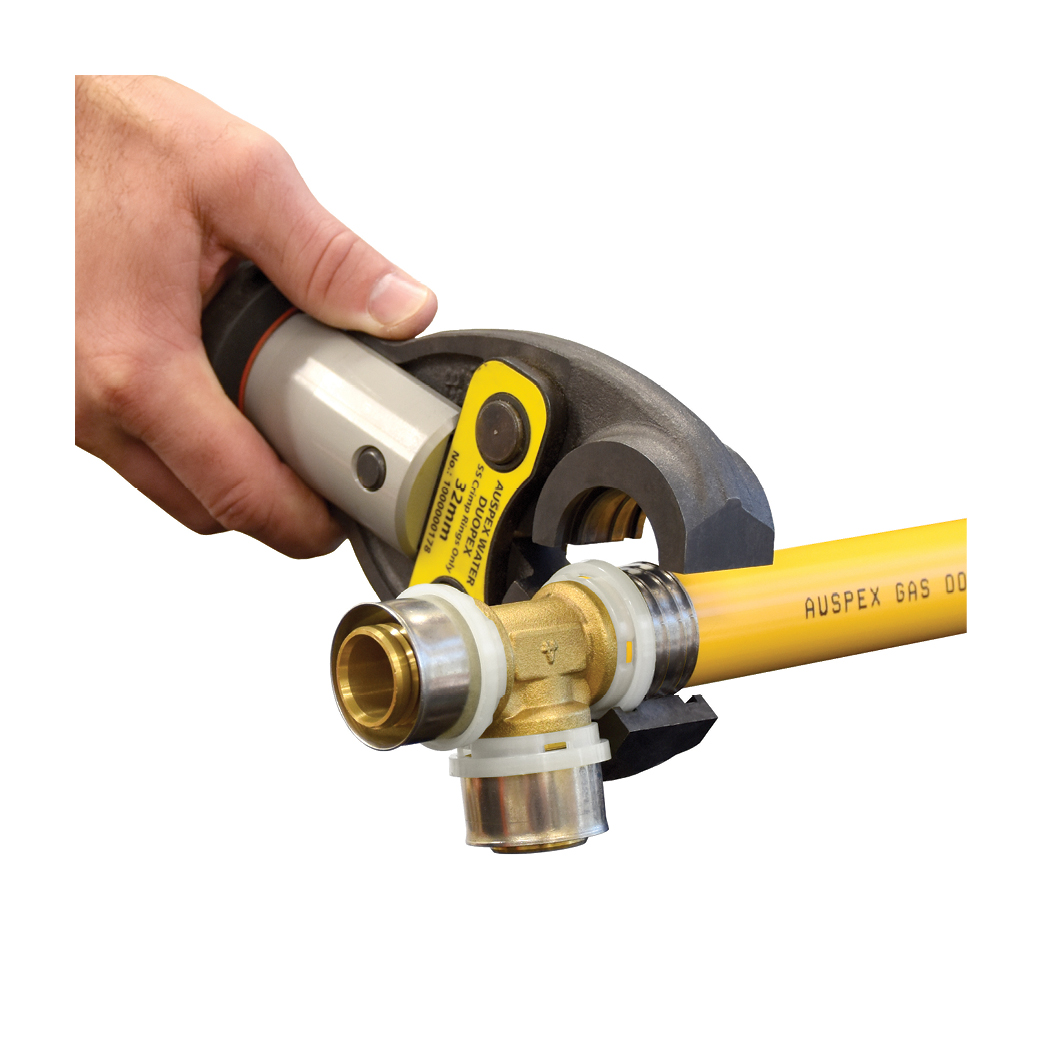
With the jaws open place the fitting inside the jaws so that the raised section of the plastic sight ring fits into the slot in the jaws. Release the jaws so they fit perfectly over the fitting, ensuring that the raised section of the plastic holding ring is still located in the slots in the jaw.
Step 11
Press the switch mechanism until the joint is completed and the piston has retracted back into the body of the tool.
Step 12
Press the back end of the jaws and remove the completed joint.
Crimping Tool
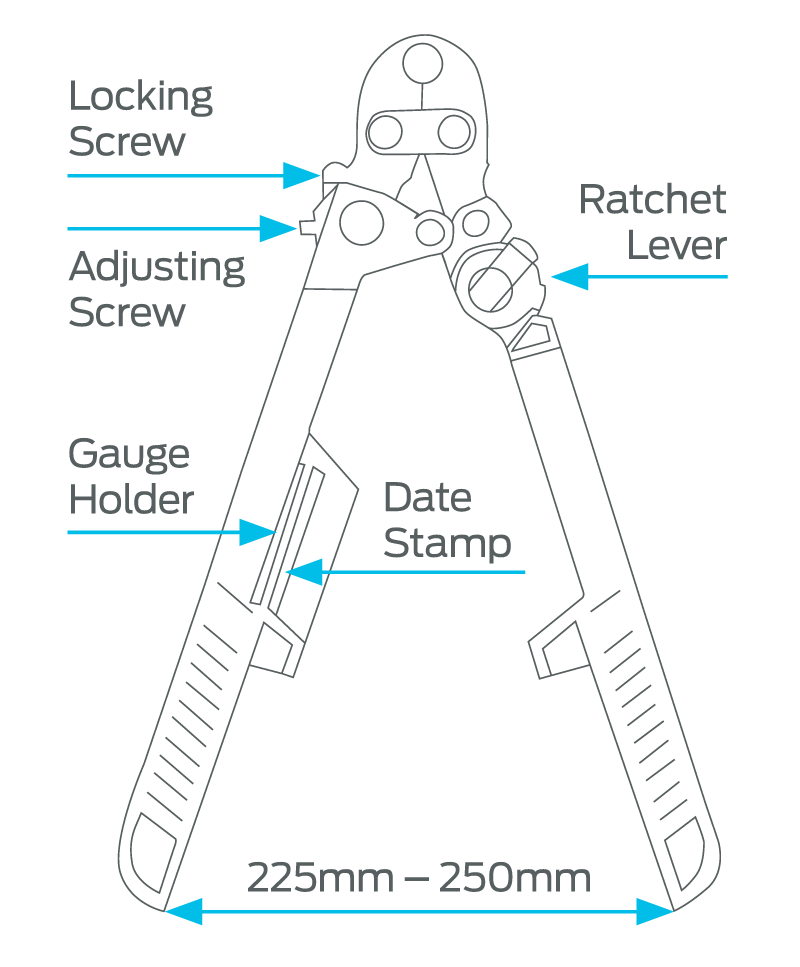
Adjustment of Tool
- With the tool open, apply light pressure inwards.
- The handle should be positioned somewhere between 225-250mm apart.
- If adjustment is required, back off locking screw 3-4 full turns.
- Turn adjusting screw in ¼ turn increments, adjusting screw slot should finish in a vertical or horizontal position.
- Recheck opening of handle measurement.
- When set, tighten down locking screw.
- Conduct a crimp and gauge check. Readjust tool if crimp not satisfactory.
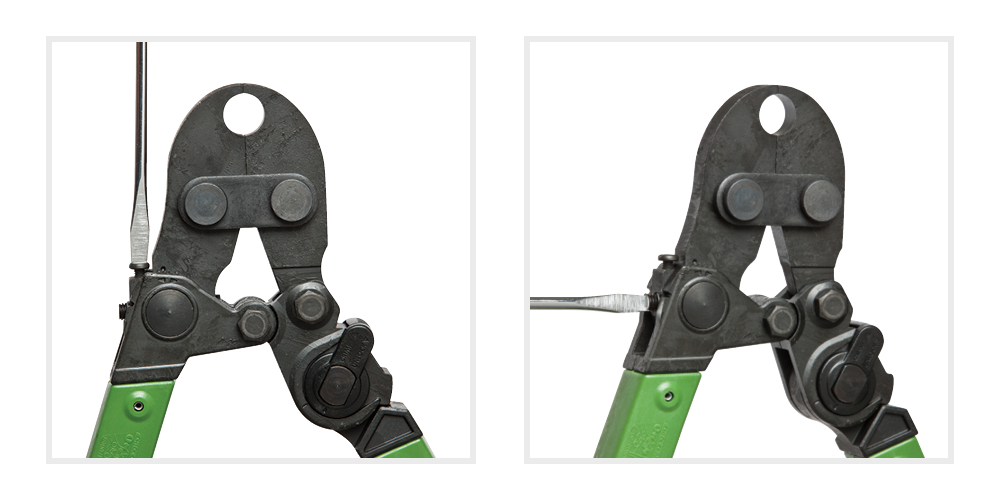
If the gauge fails, repeat adjustment until trial crimped joint is correct. More detailed instructions are included with the tool.
Ratcheting
Move Ratchet Lever up or down to suit movement.
Nominal Adjustment
225mm – 250mm.
Gauge
Ensure crimped connection passes through gauge opening on all sides of the joint.


